

JBL Charge 3 Instruction Manual: A Comprehensive Guide
Welcome! This manual provides detailed guidance for enjoying your new JBL Charge 3 portable Bluetooth speaker‚ ensuring optimal performance and longevity.
The JBL Charge 3 is a powerful and versatile portable Bluetooth speaker designed to deliver high-quality audio wherever life takes you. This robust speaker combines impressive sound with a durable‚ splashproof design‚ making it an ideal companion for indoor and outdoor adventures.
Whether you’re hosting a backyard barbecue‚ relaxing by the pool‚ or embarking on a hiking trip‚ the Charge 3 provides a reliable and immersive listening experience. Its long-lasting battery ensures hours of uninterrupted playback‚ while the integrated power bank functionality allows you to charge your smartphones and tablets on the go.
This instruction manual will guide you through every aspect of the JBL Charge 3‚ from initial setup and Bluetooth pairing to utilizing its advanced features like JBL Connect+ and understanding its waterproof capabilities. Prepare to unlock the full potential of your new speaker!
What is the JBL Charge 3?
The JBL Charge 3 is a portable Bluetooth speaker engineered for exceptional audio performance and rugged durability. It’s more than just a speaker; it’s a power source and a reliable audio companion built to withstand the elements.
Featuring a high-capacity rechargeable battery‚ the Charge 3 delivers up to 20 hours of playtime‚ ensuring your music keeps going as long as you do. Its IPX7 waterproof design means it can be submerged in water without worry‚ perfect for poolside parties or beach trips.
Beyond its robust build‚ the Charge 3 boasts a built-in power bank‚ allowing you to charge your smartphone or tablet directly from the speaker. With JBL Connect+‚ you can wirelessly link multiple JBL Connect+ enabled speakers for an amplified listening experience. It’s designed for life on the move!
Key Features and Benefits
The JBL Charge 3 shines with several standout features. Enjoy immersive‚ high-fidelity sound thanks to its advanced audio technology and powerful drivers. Its IPX7 waterproof rating provides peace of mind against splashes and even full submersion.
Benefit from an impressive 20 hours of playtime on a single charge‚ keeping your music flowing all day and night. The integrated power bank lets you conveniently charge your mobile devices‚ eliminating battery anxiety.
JBL Connect+ allows you to wirelessly connect over 100 JBL Connect+ enabled speakers for a truly expansive soundscape. The rugged design ensures durability‚ while the compact size makes it incredibly portable. Experience freedom‚ power‚ and exceptional audio quality – all in one package!
Package Contents – What’s in the Box?
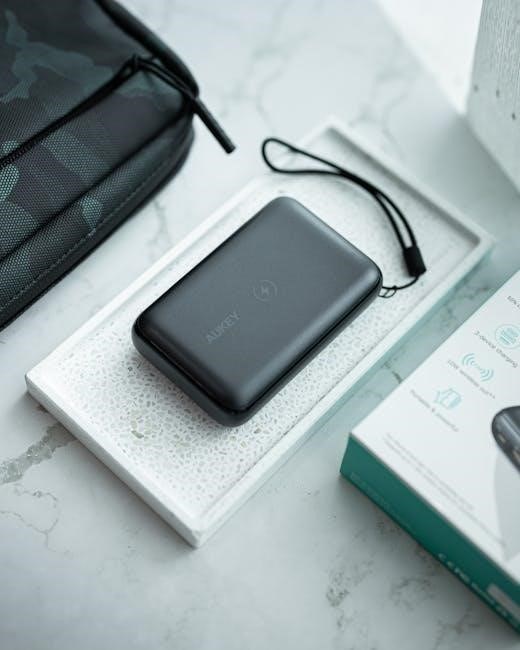
Upon opening your JBL Charge 3 package‚ you should find the following items carefully included. First‚ you’ll receive the JBL Charge 3 Bluetooth speaker itself‚ ready to deliver powerful sound. A micro-USB cable is provided for charging the speaker‚ ensuring you can quickly power it up.
You’ll also find a Quick Start Guide‚ offering a simplified overview of setup and basic operation. For more detailed information‚ a comprehensive Safety Sheet is included‚ outlining important safety precautions.
Finally‚ a Warranty Card is present‚ detailing the terms and conditions of your product’s warranty. Please verify that all these components are present and in good condition. If anything is missing or damaged‚ contact JBL customer support immediately.
Getting Started: Initial Setup
Before enjoying your JBL Charge 3‚ a few simple steps will get you up and running. First‚ carefully remove the speaker and all accessories from the packaging‚ discarding any protective films. Locate the charging port on the speaker – it’s covered by a waterproof flap.
Connect the included micro-USB cable to the speaker and a USB power source (like a computer or wall adapter). Allow the speaker to charge fully before initial use; a full charge typically takes around 3-4 hours. While charging‚ the power button will pulse.
Once charged‚ press and hold the power button to turn on the speaker. You’ll hear a power-on chime. The Bluetooth indicator light will begin flashing‚ signaling it’s ready for pairing. Now you’re ready to connect to your devices!
Charging the Speaker for the First Time
To maximize the JBL Charge 3’s battery lifespan and ensure optimal performance‚ a full charge is recommended before its initial use. Connect the provided micro-USB cable securely to the speaker’s charging port‚ located behind the waterproof flap. Plug the other end into a USB power source – a computer USB port or a USB wall adapter works well.
During charging‚ the power button will illuminate and pulse slowly‚ indicating the charging process is underway. A full charge typically takes approximately 3 to 4 hours. Once fully charged‚ the power button will illuminate steadily.
Disconnect the cable once charging is complete. It’s best to avoid leaving the speaker plugged in for extended periods after it’s fully charged to preserve battery health. Enjoy hours of wireless audio!
Powering On and Off
Powering on your JBL Charge 3 is simple: press and hold the Power button located on the top of the speaker for approximately one second. You’ll hear an audio chime confirming the speaker is on‚ and the Bluetooth indicator light will begin to flash‚ signaling it’s ready for pairing.
To power off the speaker‚ repeat the process – press and hold the Power button for approximately one second. Again‚ an audio chime will confirm the speaker is shutting down. The indicator lights will turn off‚ signifying the device is completely powered down;
Remember to fully power off the speaker when not in use to conserve battery life. Accidental activation can drain the battery over time. A quick press doesn’t turn it off!
Understanding the Button Layout
The JBL Charge 3 features a straightforward button layout for easy operation. On the top panel‚ you’ll find the Power button‚ used for turning the speaker on and off. Adjacent to it are the Volume Up (+) and Volume Down (-) buttons‚ controlling the audio level.
The central Bluetooth button initiates pairing with your devices. The JBL Connect+ button allows you to wirelessly link multiple compatible JBL speakers for an enhanced audio experience. Finally‚ the speakerphone functionality is controlled via the dedicated call buttons.
Located on the side panel are the Charge port and the Aux-in port. Familiarizing yourself with these controls will ensure seamless operation and allow you to fully utilize all the features of your JBL Charge 3.
Bluetooth Connectivity
The JBL Charge 3 utilizes Bluetooth technology for wireless audio streaming. Bluetooth offers a convenient and reliable connection to your smartphones‚ tablets‚ and other compatible devices. Ensure Bluetooth is enabled on your source device before attempting to pair.
The speaker supports Bluetooth version 4.1‚ providing a stable connection within a range of approximately 33 feet (10 meters). Obstructions like walls can reduce this range. For optimal performance‚ keep the speaker and your device within clear line of sight.
The Bluetooth button on the speaker initiates the pairing process. Once paired‚ the speaker will automatically reconnect to the device when in range‚ offering a hassle-free listening experience.
Pairing with Your Smartphone or Tablet
To pair your JBL Charge 3 with a smartphone or tablet‚ first‚ ensure the speaker is powered on. Press and hold the Bluetooth button until the Bluetooth indicator light begins to flash blue. This signifies the speaker is in pairing mode.
On your smartphone or tablet‚ navigate to the Bluetooth settings menu. Scan for available devices. The “JBL Charge 3” should appear in the list of discovered devices. Select “JBL Charge 3” to initiate the pairing process.
If prompted‚ enter the pairing code “0000”. Once successfully paired‚ the Bluetooth indicator light on the speaker will turn solid blue. You are now ready to enjoy wireless audio! The speaker remembers paired devices for future automatic connections.
Connecting to Multiple Devices
The JBL Charge 3 allows you to pair with up to three devices simultaneously. However‚ only one device can actively play audio at a time. To connect a second device‚ put the speaker in Bluetooth pairing mode (as described previously) with the new device while the first is already connected.
Once paired‚ you can switch between devices by pausing audio on the currently playing device and initiating playback on the desired device. The speaker will automatically detect the new audio source.
Keep in mind that frequent switching can sometimes cause minor connection hiccups. For optimal performance‚ it’s recommended to disconnect unused devices from the speaker’s Bluetooth memory via your device’s Bluetooth settings.
Troubleshooting Bluetooth Connection Issues
Experiencing connection problems? First‚ ensure Bluetooth is enabled on your device and the JBL Charge 3. Move devices closer together – obstacles can interfere. If pairing fails‚ “forget” the speaker in your device’s Bluetooth settings and re-pair.
Interference? Other wireless devices can cause issues. Try turning off nearby Bluetooth devices temporarily. Resetting the speaker (refer to online resources for instructions) can also resolve persistent problems.
Still struggling? Confirm your device supports the correct Bluetooth profile (A2DP is essential). Check for software updates for both your device and the speaker (via the JBL Connect app‚ if applicable). Finally‚ a full speaker reset often resolves complex connectivity faults.
Sound Control & Customization
Fine-tune your audio experience! The JBL Charge 3 offers simple yet effective sound control. Use the volume up (+) and volume down (-) buttons on the speaker for immediate adjustments. For a richer‚ more powerful sound‚ understand the role of the integrated JBL Bass Radiator – it enhances low-frequency performance.
Adapt to your surroundings! Consider the environment when adjusting volume. Outdoor spaces require higher levels than quiet indoor settings. Experiment with speaker placement; a solid surface minimizes vibrations and improves clarity;
Personalize your sound! While the Charge 3 lacks a dedicated EQ‚ some devices offer audio customization options. Explore your smartphone or tablet’s settings for potential enhancements. Remember‚ optimal sound is subjective – find what sounds best to you!
Adjusting the Volume
Effortless control at your fingertips! Adjusting the volume on your JBL Charge 3 is incredibly straightforward. Locate the dedicated volume up (+) and volume down (-) buttons on the top control panel of the speaker. A single press of either button increases or decreases the volume incrementally.
Listen for cues! As you adjust‚ you’ll hear audible beeps confirming each volume level change. Be mindful of these cues to avoid excessively loud or quiet playback. The volume level is also visually indicated on your connected device’s screen.
Maximum volume considerations! While the Charge 3 can get loud‚ prolonged listening at maximum volume may impact sound quality and potentially damage your hearing. Use responsibly and enjoy a balanced audio experience!
Understanding the JBL Bass Radiator
Feel the bass! The JBL Charge 3 features a prominent passive bass radiator visible on either end of the speaker. This isn’t a traditional speaker driver; instead‚ it utilizes air pressure created by the internal drivers to enhance low-frequency performance.
How it works! As the internal drivers move‚ they push and pull air‚ causing the radiator to vibrate. This vibration amplifies the bass frequencies‚ delivering a richer‚ more impactful sound experience without requiring additional power.
Optimal placement! For best bass response‚ ensure the radiators aren’t obstructed. Placing the speaker on a flat‚ stable surface allows them to vibrate freely. Enjoy deeper‚ more resonant bass with this innovative technology!
Optimizing Sound for Different Environments
Adapt your audio! The JBL Charge 3 delivers fantastic sound‚ but environmental factors can impact the listening experience. Here’s how to optimize it;
Outdoor use: In open spaces‚ increase the volume to overcome ambient noise. Position the speaker to direct sound towards the listening area. Remember bass can dissipate more quickly outdoors.
Indoor use: In smaller rooms‚ lower volumes are sufficient. Placing the speaker near a wall can enhance bass response. Avoid corners‚ which can sometimes create unwanted resonance.
Bathroom/Poolside: While waterproof‚ sound can be affected by hard surfaces. Experiment with placement to minimize echoes and maximize clarity. Enjoy your music anywhere!
Utilizing the Speakerphone Function
Hands-free calling! The JBL Charge 3 features a built-in speakerphone for convenient call management. To answer an incoming call‚ press the Phone button once. To end a call‚ press the Phone button again.
Making calls: Initiate a call from your connected smartphone as usual. The audio will automatically route through the speaker. Ensure your phone is within a reasonable Bluetooth range for optimal performance.
Volume control during calls: Use the Volume Up (+) and Volume Down (-) buttons to adjust the call volume. The speakerphone utilizes noise cancellation technology for clearer conversations‚ but minimize background noise for best results. Enjoy clear‚ hands-free communication!
Making and Receiving Calls
Seamless communication! The JBL Charge 3 allows for hands-free calling via its integrated speakerphone. When a call arrives while music is playing‚ the music will automatically pause‚ and you’ll hear the ringtone through the speaker.
Answering calls: A single press of the Phone button answers the incoming call. To reject a call‚ press and hold the Phone button for approximately one second. The built-in microphone ensures clear voice transmission.
Ending calls: Press the Phone button once more to end the current call. The music will resume playing after the call concludes. For optimal call quality‚ position the speakerphone away from excessive noise sources. Enjoy convenient‚ hands-free calls!
Call Quality and Microphone Performance
Clear conversations! The JBL Charge 3 features a built-in microphone designed for clear voice capture during calls. However‚ several factors can influence call quality. Background noise‚ distance from the speaker‚ and the caller’s network conditions all play a role.
Optimizing clarity: For best results‚ use the speakerphone in a quiet environment. Speak directly towards the microphone located on the speaker’s top panel. Avoid placing the speaker directly against soft surfaces‚ which can muffle the sound.
Potential issues: While the microphone offers noise cancellation‚ extremely loud environments may still impact clarity. If callers report difficulty hearing you‚ try moving to a quieter location. Consistent issues may indicate a network problem.
Using Voice Assistants (Siri‚ Google Assistant)
Hands-free control! The JBL Charge 3 allows convenient access to voice assistants like Siri and Google Assistant via your connected smartphone. To activate your assistant‚ simply press and hold the dedicated button on the speaker – identified by the microphone icon.
Activation process: This action will trigger your phone’s voice assistant‚ even if the screen is locked. You can then issue commands as usual‚ such as playing music‚ making calls‚ or checking the weather.
Compatibility notes: Ensure your smartphone has the voice assistant enabled and properly configured. The functionality relies on a stable Bluetooth connection. If the voice assistant doesn’t respond‚ verify your phone’s settings and Bluetooth pairing.
Waterproof & Durable Features
Adventure-ready! The JBL Charge 3 is engineered for an active lifestyle‚ boasting robust waterproof and durable features. It’s designed to withstand splashes‚ rain‚ and even full submersion‚ making it perfect for poolside parties‚ beach trips‚ or outdoor adventures.
Rugged construction: The speaker’s durable rubber housing provides excellent protection against bumps and scratches. This ensures it can handle the rigors of daily use and travel. However‚ while durable‚ it isn’t indestructible – avoid extreme impacts.
IPX7 rating explained: We’ll delve into the specifics of the IPX7 waterproof rating in the next section‚ detailing what it means for your speaker’s water resistance and how to best utilize this feature safely.
Understanding the IPX7 Waterproof Rating
IPX7 defined: The JBL Charge 3 carries an IPX7 waterproof rating‚ a crucial specification for understanding its water resistance. This rating signifies the speaker can be immersed in water up to 1 meter (approximately 3.3 feet) deep for up to 30 minutes.
Important limitations: While IPX7 provides substantial protection‚ it’s not a free pass for prolonged submersion or exposure to saltwater. Saltwater corrosion can damage the speaker over time. Avoid dropping the speaker from heights into water.
Port protection: Ensure the protective flap covering the auxiliary and charging ports is securely closed before exposing the speaker to water. This is vital for maintaining the waterproof integrity.
Caring for Your JBL Charge 3 in Wet Conditions
Post-exposure drying: After exposing your JBL Charge 3 to water‚ thoroughly dry the speaker with a soft‚ clean cloth. Pay particular attention to the charging port and any seams where water might accumulate.
Air drying: Allow the speaker to air dry completely before charging. Do not attempt to charge the speaker while it is wet‚ as this could cause electrical damage. Ensure the protective flap is open during air drying to facilitate ventilation.
Rinsing after saltwater: If exposed to saltwater‚ gently rinse the speaker with fresh water to remove any salt residue. This helps prevent corrosion and maintains the speaker’s longevity. Avoid using harsh chemicals or abrasive cleaners.
Protecting the Speaker from Damage
Avoid extreme temperatures: Do not expose your JBL Charge 3 to prolonged periods of extreme heat or cold‚ as this can damage the battery and internal components. Store it in a temperature-controlled environment.
Preventing drops and impacts: While durable‚ the speaker isn’t indestructible. Avoid dropping it onto hard surfaces or subjecting it to significant impacts. Consider using a protective case for added security during transport.
Safe storage: When not in use‚ store the speaker in a clean‚ dry place‚ away from dust and direct sunlight. Avoid placing heavy objects on top of it. Regularly inspect the speaker for any signs of physical damage.
JBL Connect+ Feature
Expand your audio experience with JBL Connect+‚ allowing you to wirelessly link over 100 JBL Connect+ enabled speakers together! This feature amplifies your sound‚ creating a powerful and immersive audio environment for any occasion.
Simple pairing process: Activate JBL Connect+ on your JBL Charge 3 by pressing the dedicated Connect+ button. Ensure other speakers are in Connect+ pairing mode as well. They will automatically synchronize‚ creating a unified sound system.
Master and Slave functionality: One speaker acts as the master‚ receiving the audio signal‚ while others function as slaves‚ mirroring the audio. Volume control on the master speaker adjusts the overall sound. Enjoy a truly connected audio experience!
Pairing with Other JBL Connect+ Speakers
To initiate pairing‚ ensure your JBL Charge 3 and the other JBL Connect+ speakers are powered on and within range – ideally‚ within 30 feet (10 meters) of each other. Press the JBL Connect+ button on each speaker you wish to pair. A blue light will indicate pairing mode.
Automatic Synchronization: The speakers will automatically detect and connect to each other. You’ll hear a confirmation tone once the connection is established. The first speaker activated becomes the master‚ receiving the primary audio signal.
Adding More Speakers: To add additional speakers‚ simply repeat the process. Remember‚ you can connect over 100 Connect+ enabled speakers for a massive sound experience! Verify all speakers are synchronized for optimal performance;
Creating a Multi-Speaker Sound System
Once paired‚ your JBL Charge 3 and other Connect+ speakers function as a unified sound system. Audio will play simultaneously across all connected devices‚ amplifying your listening experience. The master speaker controls the volume for the entire group; adjustments made on one speaker affect all others.
Stereo Pairing: For a wider soundstage‚ pair two JBL Charge 3 speakers in stereo mode. One will act as the left channel‚ and the other as the right‚ creating immersive audio. Ensure both speakers are close together for optimal stereo separation.

Party Mode: Enjoy synchronized audio across all speakers in Party Mode. This is ideal for large gatherings‚ ensuring everyone hears the same music at the same time. Experiment with speaker placement to achieve the best sound distribution!
Troubleshooting JBL Connect+ Issues
If speakers fail to connect‚ first ensure all devices are within range and have sufficient battery life. Restarting the master speaker often resolves connection problems. Check the JBL Connect+ app for firmware updates‚ as outdated software can cause compatibility issues.
Interference: Wireless interference from other Bluetooth devices or physical obstructions can disrupt the connection. Move devices closer together and away from potential sources of interference. Try resetting the Connect+ pairing on all speakers involved.
Factory Reset: As a last resort‚ perform a factory reset on the problematic speaker(s). This will erase all previous pairings and allow you to start the connection process anew. Refer to the “Powering On and Off” section for reset instructions.
Battery Information & Management
The JBL Charge 3 utilizes a rechargeable lithium-ion battery‚ offering up to 20 hours of playtime. Battery life varies depending on volume levels and audio content. Avoid exposing the speaker to extreme temperatures‚ as this can degrade battery performance over time.
Optimal Charging: For best results‚ use the provided USB cable and a 5V/2.1A power adapter. Fully charging the battery typically takes approximately 4;5 hours. Avoid leaving the speaker plugged in for extended periods after it’s fully charged.
Long-Term Storage: If storing the speaker for an extended period‚ charge it to around 50% to maintain battery health. Regularly check and recharge the battery to prevent deep discharge‚ which can permanently damage the battery.
Battery Life and Usage Time

The JBL Charge 3 boasts an impressive battery life‚ delivering up to 20 hours of continuous audio playback on a single charge‚ at around 50% volume. Actual playtime will fluctuate based on volume settings‚ audio source‚ and environmental temperature.
Higher Volumes: Playing music at maximum volume will significantly reduce battery life‚ potentially to as little as 6-8 hours. Lower volumes‚ conversely‚ will extend playtime. Streaming music via Bluetooth consumes more power than using an auxiliary cable.
Speakerphone Use: Utilizing the speakerphone function also impacts battery duration. Expect approximately 15-20 hours of standby time when the speaker is connected via Bluetooth but not actively playing audio.
Checking the Battery Level
Monitoring the Charge 3’s battery level is straightforward. Five LED lights located on the speaker’s base indicate the remaining charge. A full five lights signify a complete charge‚ while fewer lights represent decreasing battery capacity.
Individual Lights: Each lit LED generally corresponds to approximately 20% of battery life. For example‚ three lit LEDs indicate roughly 60-80% charge remaining. When only one LED is illuminated‚ it’s time to recharge the speaker.
Low Battery Indication: The speaker will also provide an audible low-battery warning when the charge is critically low. Additionally‚ when connected to a smartphone‚ the battery level may be displayed on the device’s Bluetooth connection screen‚ depending on the phone’s operating system.
Maximizing Battery Performance
To extend your JBL Charge 3’s battery life‚ consider several factors. Avoid consistently playing music at maximum volume‚ as this drains the battery faster. Moderate volume levels offer a better balance between sound quality and power consumption.
Bluetooth Efficiency: Ensure your connected device isn’t also heavily utilizing Bluetooth for other functions simultaneously‚ as this can impact the speaker’s battery. When not in use‚ completely power off the Charge 3 instead of leaving it in standby mode.
Storage Conditions: Store the speaker in a cool‚ dry place when not in use for extended periods. Extreme temperatures can negatively affect battery health. Regularly charging and discharging the battery helps maintain its overall capacity over time.